

Every React Native engineer knows the telltale sign of an unoptimized build: that jarring, half-second white screen flash before your JavaScript bundle unpacks and mounts the UI. You do not need to pull in heavy third-party dependencies to fix this. The solution lies directly inside Android's native rendering pipeline, long before the React Native bridge or the JavaScript runtime even wakes up.
By leveraging native XML layer-lists and overriding windowBackground at the platform level, you can achieve an instant, native launch screen that renders with absolute zero JavaScript overhead.
The Architecture of the Cold Launch Flash
When an Android OS starts an app process, it creates the window and immediately renders whatever placeholder is defined in the application's base theme. If you leave the theme untouched or push splash screen management exclusively into React components, the window displays the fallback default: a blank, blinding white canvas.
App Process Fork -> Native Window Init (Reads windowBackground) -> React Native Bridge Initializes -> JS Bundle Parsed -> Root React Component Mounts
If your splash screen lives only in JavaScript, it mounts at the very end of this timeline. By assigning a custom drawable to android:windowBackground, you hijack the earliest stage of the launch pipeline:
| Phase | Standard Setup | Native XML Splash Setup |
|---|---|---|
| Process Fork & Window Creation | Blank window fallback (White flash) | Instant native XML asset rendering |
| Bridge & JS Engine Spin-up | White screen persists | Splash screen remains visible |
| Root View Mount | React-driven splash mounts (Late) | React Native UI seamlessly replaces window background |
Step 1: Project Initialization
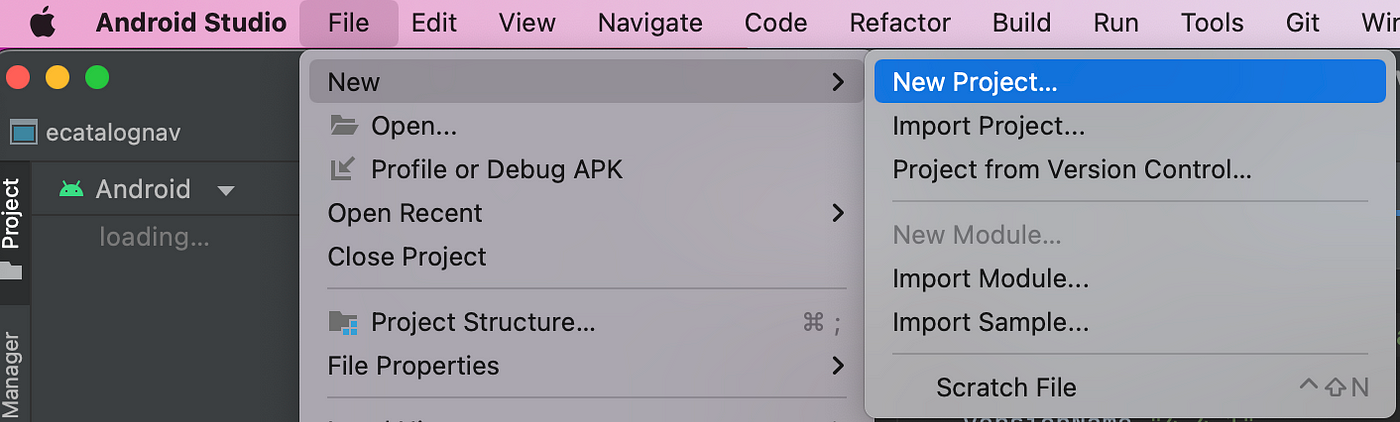
Begin inside Android Studio by either opening your existing React Native Android directory or launching a fresh environment: File → New → New Project.
 |
|---|
| Android Studio Project Setup |
Step 2: Construct the Vector Layer-List
Avoid bundling multiple heavy PNG files across bucket densities whenever possible. Using an XML-based Vector Drawable or vector assets keeps your APK footprint lean while scaling predictably across every viewport density.
Navigate to your resources directory:
app/src/main/res
If it does not exist, right-click res → New → Android Resource Directory, select drawable as the resource type, and create it. Within drawable, add a file named splash_screen.xml:
xml<?xml version="1.0" encoding="utf-8"?>
<layer-list xmlns:android="http://schemas.android.com/apk/res/android">

    <item android:drawable="@color/splash_background"/>

    <item>
        <bitmap
            android:gravity="center"
            android:src="@mipmap/ic_launcher"/>
    </item>

</layer-list>
This <layer-list> establishes a two-layer composite. The base layer paints the entire canvas using your background color asset. The top layer sits precisely in the viewport center, rendering your targeted bitmap asset. You can easily swap @mipmap/ic_launcher for a Vector Asset created through New → Vector Asset.
Step 3: Configure Theme Layering (styles.xml)
Open app/src/main/res/values/styles.xml. To intercept the default rendering cycle, assign your newly created layer-list directly to android:windowBackground:
xml<resources>
    <!-- Base application theme. -->
    <style name="AppTheme" parent="Theme.AppCompat.DayNight.NoActionBar">
        <!-- Customize your theme here with custom splash screen-->
        <item name="android:editTextBackground">@drawable/rn_edit_text_material</item>
        <item name="android:windowBackground">@drawable/splash_screen</item>
        <item name="android:windowFullscreen">true</item>
    </style>
</resources>
Why These Flags Matter:
android:windowBackground: Instructs the Android window manager to drawsplash_screen.xmlthe exact microsecond the window is constructed.android:windowFullscreen: Removes system chrome, status bars, and navigation boundaries to give your brand mark an uninterrupted presentation.
Step 4: Isolate Design Tokens (colors.xml)
Keep your style references modular. Under app/src/main/res/values, create or modify colors.xml:
xml<?xml version="1.0" encoding="utf-8"?>
<resources>
    <color name="splash_background">#35386f</color>
</resources>
Defining #35386f in a centralized color registry allows you to maintain exact visual parity across your native configuration and JavaScript design tokens.
Step 5: Bind the Theme in the Manifest (AndroidManifest.xml)
Your configuration remains dormant until declared in your application manifest. Open AndroidManifest.xml and ensure the base <application> tag binds to your modified theme:
xml<application
      android:name=".MainApplication"
      android:label="@string/app_name"
      android:icon="@mipmap/ic_launcher"
      android:roundIcon="@mipmap/ic_launcher_round"
      android:allowBackup="false"
      <!-- Our Customize theme. -->
      android:theme="@style/AppTheme">
      <activity
        android:exported="true"
        android:name=".MainActivity"
        android:label="@string/app_name"
...
...
The attribute android:theme="@style/AppTheme" on the <application> node acts as the critical switch. Omit this, and the OS ignores your layer-list, reverting to the standard blank theme during process startup.
The Runtime Outcome
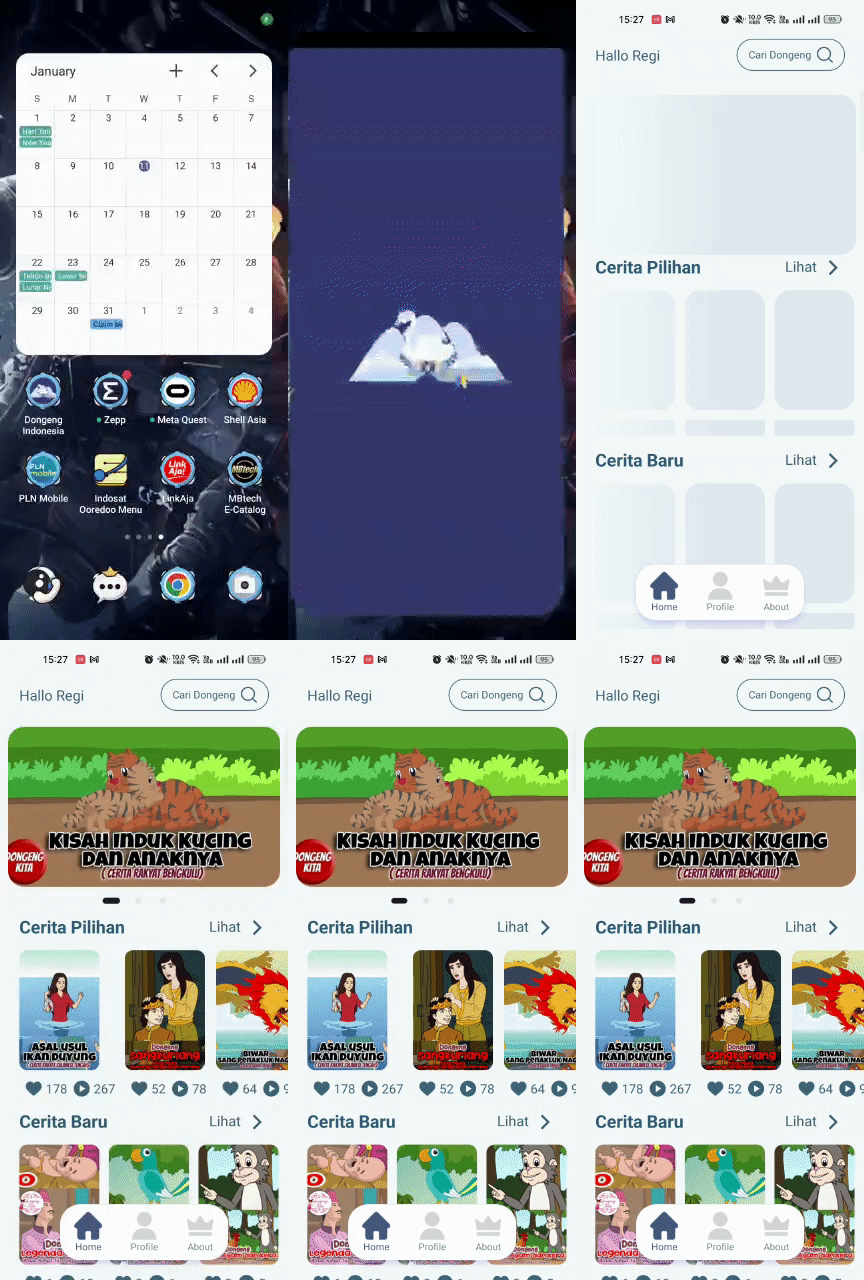
You now have a cold boot sequence that executes cleanly without third-party libraries, bridging overhead, or manual UI hacks:
 |
|---|
| Completed Native XML Splash Execution |
For production applications with more complex requirements, you may eventually evaluate migrating to the Android 12+ SplashScreen API (core-splashscreen compatibility library) to support programmatic icon animations and transition management. But if your goal is an unbloated, high-performance, zero-dependency baseline that kills the white flash forever, this native XML implementation gets the job done cleanly.